Sunday, November 15, 2009

Card Box - Easy!


Card boxes come in a variety of shapes, sizes, and even themes. Bird cages are popular, but there is the fear that cards can easily be slipped out through the cage bars (although, seriously, who are these people being invited to weddings who would steal from the bride and groom???).

I wanted a damask-like box to tie into our wedding's theme. Etsy had some wonderful selections, but they were rather expensive for, well, a box - not to mention that this box would then have to fit in the car at the end of the night with the other gifts.

So, with only a few weeks to go, I decided to make my own box. Because we had received many of the wedding gifts prior to the event, there were several box of varying size hanging around the apartment. I decided on the box our new knife set came in (awesome Calphalon knives, by the way!) and wrapped it in white-on-white paper from The Container Store. I then wrapped a band of light blue chiffon ribbon (also from the Container Store) around the box about 1/3 of the way down from the top.
I made the bow following these instructions from, who else, but Martha:
Don't forget to cut a slit on the top of the box! (An Exacto knife will help to make this more accurate.)

TOTAL COST FOR THIS PROJECT:
Box (find a used one): $0.00
Wrapping paper: $6.99
Chiffon ribbon: $4.99
TOTAL COST: $11.00

Monday, November 9, 2009

The To-Do List

When Hubby and I got engaged, it is safe to say that he did not have a clear understanding of all the things that needed to be done and made in order for a wedding to take place. About a month into the engagement, he asked, "I am having a hard time visualizing the to do list. Can you print it out and tape it to the wall for me?"

He thought it would be a regular sized piece of paper. Yeah, well, those fantasies were dashed when I brought home this and taped it to the wall:

That's right. Good ol' Martha Stewart had provided us with upwards of 100 (way upwards) tasks to complete. And those were just the starters... add in the various handmade items we were making and we had lists for months!

Needless to say, when Hubby came home from work that day, he exclaimed, "What is THAT?" "The list you requested," I calmly replied. "Um. I can't do anything with that," was his honest answer.

After that, we had two lists taped to the wall: the giant Martha Stewart list and Hubby's week-by-week (or month-by-month, as it later evolved) list. Two distinct lists for two distinct personalities!

What lists have you found that are proving to be helpful (or a hinderance?)

Back in the Saddle

I took a hiatus from blogging for awhile there. My apologies. But now I am post-wedding and rested and ready to go!

Sneak Peak for future blogs:
  • Bouquet monogram designs
  • Handmade earrings for bridesmaids
  • Handmade gifts for groomsmen
  • Tissue paper flower posies

Sunday, September 6, 2009

eBay Part II: The Sniper Bid!


I am currently waiting to place a sniper bid on eBay. What is a sniper bid, you ask? Just one of the more fun (and sometimes anxiety-causing) aspects of eBay!

(There are thirty-three minutes left on the auction I am watching.)

Behold: I am looking to purchase at least 7 pint-size, blue Ball canning jars to hold one hydrangea blossom each along the front of the sweetheart table. To buy clear jars is simple (I recommend eBay vendor Denny and Kathy's Super Store). But to purchase blue jars is a little more difficult because a blue Mason jar means an old jar, thus an antique and more expensive. Sometimes. However, sometimes you can find the blue jars at a great price on eBay... if you know how to bid properly. *enter evil laugh*

Here's how it works. Find an item you would like to purchase on eBay. If it has the "Buy it Now" button, then by all means, buy it right then and there. However, some items require bidding. Rather than entering a bid with a few days left, simple click on "Watch this item." Now you can see how high the bidding war goes without actually perpetuating it yourself. Once there are approximately twenty minutes left in the bid, simple keep a window open on your computer and watch the time tick down.

(There are twenty-seven minutes left on the auction I am watching.)

I won't lie. This waiting can cause anxiety and tempt you to bid too soon. But as Mel Gibson ordered in "Braveheart," HOLD... HOLD... HOLD!!! Depending on your typing speed and eBay ability, enter your bid with five minutes left in the bidding war. That should give you enough time for the bid to process and for you to find out if you have been outbid by a previous bidder's maximum bid. If you have been outbid, quickly consider how high you think the other bidder's maximum bid might be, determine how high you want to bid, and type that new amount in!

(There are twenty minutes left on the auction I am watching.)

While waiting, I recommend finding something else to keep your mind entertained. Try checking your email or playing a solitaire game... or doing the dishes or blogging... or... oh, just count down faster!!! See? Fun, isn't it? :-)


(There are fifteen minutes left on the auction I am watching.)

There are other options, too. AuctionSniper allows you to enter you maximum bid at any point during the auction and the computer automatically enters your bid at the last couple seconds. But what fun is that? Also, you better make sure your maximum bid is high enough to beat out everyone else's. (Another similar website is EZ Sniper.)

(There are five minutes left in the auction I am watching.)

I enter a bid. I am outbid. I enter another bid. Again, outbid. Hmmm. Now I have to ask myself, "How much do I really want to pay for these jars?" Plus shipping. After trying one more bid, which fails, I decide to pack away my auction paddle and call it a day. Too rich for my blood.

Oh, but look! Another person has listed his/her blue Mason jars. Let the watching begin again...

Ring Bearer Gift - Doorknob Hanger

Our ring bearer is Future Hubby's little nephew, who will be three at the time of the ceremony. Besides being the cutest little tow-head ever, he is going to be so handsome in a tux!

Being the little brother to two older sisters can be rough, so having his own room is important for Jack - at least it will be when he is old enough to know better! This patriotic door hanger will let everyone know just whose room it is!!!

From Michael's, I purchased a door hanger, mini stars, and alphabet tiles by Lara's Crafts in unfinished wood.


I then planned where I would place the paint, stars, and letters.


I taped off different sections for the field of blue and red and white stripes. The small stars just needed a quick layer of white paint. (I used some old tubes of Utrecht paint I had left over from another project.)


Finish by gluing on the stars and letters using a hot glue gun. (Note: If you tend to use too much glue - like me - let the glue dry and use an Exacto knife to CAREFULLY cut and remove the excess glue bulges.)

TOTAL COST FOR THIS PROJECT:
Door hanger: $0.89
Mini stars: $2.99
Alphabet tiles: $3.99
Paint: free (left over)
TOTAL: $7.87

Sunday, August 23, 2009

Thank You Notes for Each Guest


So many people have helped, offered to help, and provided such support to Future Hubby and I during all this planning, that we wanted to let each wedding guest know how much we appreciate them and their presence at our wedding.

The easiest way we could think we doing this, in addition to going from table to table and greeting our guests, was to tuck a thank you note into the napkin at each place setting. The message also thanks those who traveled to join us, including both sets of my parents and the groom's grandpa.


To see how to assemble these notes, click here. And since we already a ton of paper left over from making the invitations and inserts, this project only cost us the price of three roller adhesives: $6.00!

What other methods of "thank you" have you seen at weddings (or that you used at your wedding)?

Fabulous, D.I.Y. Cupcake Stands!


Good riddance to a traditional cake - let them eat cupcakes! That's right, our guests will be able to choose from three delicious cupcake flavors: chocolate raspberry, chocolate abuelita (like a cinnamon chocolate), and lemon raspberry.

We are expecting approximately 160 guests. Well, if you have researched cupcake stands, then you know most stands don't hold that many. The reception venue usually puts some of the cupcakes out at the beginning of the reception and continues to fill the stand as guests help themselves. Furthermore, to rent a stand can be expensive ($80-$150 per stand). So, we asked ourselves, why not make cupcake stands able to hold ALL of the cupcakes and then sell them after the wedding?

Future Hubby has a friend who owns his own woodworking studio, and the two of them cut long planks of paint-grade plywood (purchased from Lowe's) into smaller squares. They then used a special woodworking tool (that's the technical term - ha ha ha!) to add a decorative edge that resembles crown moulding. After getting the measurements of one cupcake from our cupcake vendor (Betty's Sweet Dreams), we determined how many cupcakes would be able to fit on each layer. Here is the schematic we designed:

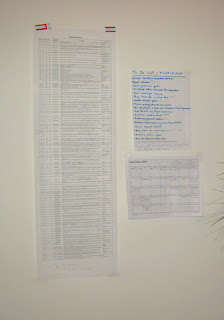
Each stand can hold seventy-six cupcakes, times two stands, that's 152 cupcakes. That leaves eight cupcakes leftover, plus the six-inch cake we ordered to have something to cut during the reception. Solution: a two-tiered stand for the cake and remaining cupcakes!


A trip to Home Depot resulted in three lengths of wood dowel used to hang clothing in a closet. These poles would serve as the center posts in the middle of each stand. But how to attach each layer of the stand to the pole? Just use the brass caps that normally attach to the closet wall and hold the pole in place! After many frustrating attempts to keep each layer level (seriously, this was not as easy as you might think!), Future Hubby was able to attach a brass cap under each layer and screw them into the center pole for support. (He discovered that assembling them upside down was easier.)


And here are all three stands ready to paint!


But wait! What are those cute little feet holding the stands off the floor? Michael's has an entire row of unfinished wood products, including little hexagonal boxes. After digging through all miniature boxes (the Michael's staff must think I'm a pain in the butt!), I purchased twelve boxes, ditched their lids, and Future Hubby attached them to the bottom of the stands using short screws.
We used semi-gloss white paint (there is a new line that is a combination of primer and paint) purchased from the Home Depot to paint the stands. Since these would sit on a table at the reception, we also painted the undersides for when short people (like me!) came forward for a cupcake.


If you are interested in purchasing these after mid-October (and live in the Los Angeles area), leave a comment on this posting and let me know!

TOTAL COST FOR ALL THREE STANDS:
Paint-grade plywood (2 pieces of 16"x72"x21/32"): $28.48
Paint-grade plywood (1 piece of 16"x36"x21/32"): $7.23
8' of closet dowel/pole: $10.80
14 brass closet pole holders: $23.66
12 mini boxes made into feet: $12.00
1 quart of white paint: $14.98
TOTAL COST: $96.15